Today we finished building the two new raised beds like our other two. I still need to get soil and lining before I can plant but after that it is on! I may have to buy a little bit different soil this time unless I want to wait about a week for a the other stuff to arrive in the store. That's okay, though. It might be good to try different soils and see what works best. I will decide soon, of course.... because I can hardly wait to get things growing!!!
I also worked on the frames that I am adding to our chicken coop. I had a little run in with a tiny rooster that is about to become part of a soup. He ran up behind me and started spurring my legs. Thankfully, I had on water boots and long pants... and, he is a little squirt. Our tom turkey has always been a gently guy but he has decided he is the protector of this little tiny rooster. My tom actually spurred me in the leg leaving a hole a couple a of weeks ago. Tom started after me today after I took after that tiny rooster. It was on! I grabbed a big plastic barrel and guarded myself and then, made Tom and that tiny rooster feel intimidated. Tom went in the coop and we locked him in while we worked on our project. Seriously, this little guy's life is about to end soon. Sierra was in the coop yesterday and dropped her new eye glasses. She bent over to pick them up and Tiny jumped up and spurred her in the face and left big scratches all across her face.
Anyway, I veered off track... Sierra and I got those two old raised bed frames situated in their new location and they are ready for their new life. I will need to chop up the soil a bit in the one, scatter the wheat, and cover it with wire. Wheat grows really well and really fast even in hot climates. I am still deciding if I want to use both frames for this or if I want to make one a dust bath area partially filled with sand. I am thinking that if I have two like this I could rotate planting times. I could easily find a different little area in the run to make a dust bath area. I am still deciding, though.
Showing posts with label Planting. Show all posts
Showing posts with label Planting. Show all posts
Friday, April 8, 2016
Monday, April 4, 2016
More Raised Beds & Chicken Changes: Part 1
We made the decision to add more raised beds to our garden. We will be building two more the same size and width near our others that we recently made. We purchased more tin screws and more metal flashing and that is all we needed. All is left is to assemble them, fill them with compost, and plant in them. This is very exciting to me. This year I will have a full out garden. I did not get to do that last year with it being our first year here. My husband is being such a good sport about it. This is really not his thing but he knows it is a good thing.
We also carried our old recycled wood raised beds out to the chicken coop. They are each about a foot deep and I plan to plant wheat in one of them and cover the bed with chicken wire. As the wheat grows up through the chicken wire the chickens can eat the tops off the wheat and supplement them with some extra nutrition. The other raised bed could be the same way or I might put some sand in it for a dust bath area. Any thoughts or other ideas on that would be greatly appreciated. I could always make a different area a dust bath area.
Other things we will be doing this season will be building a bigger coop. Our chickens have lots of changes in their little world right now. A few weeks ago I cut old limbs from a tree and built a long climbing and perching area for them. I also plan to do something creative with an old basketball hoop in their coop... maybe make it a nest. We have turkeys and added quail to our flock this year. We have the quail in our old rabbit caging right now inside our chicken run. We will be assessing whether this setup works for them and changing as needed. What are you doing new for your chickens and other flock this year?
Saturday, April 2, 2016
My New Raised Beds for Spring Planting
I have been keeping my eye out for the style of raised beds I wanted at our current home. At our other house I had used what I had and what I had was our old privacy fence that had been knocked down about ten years ago during Hurricane Rita. When moved here over a year ago I just never found the time to get raised beds together and did not have time to properly work the ground soil. I did bring along some of the old raised beds from the other property and the remaining fencing. Last year our focus was more on planting our orchard trees and I had my husband till up some of the ground between each fruit tree and we planted some tomatoes and pepper plants that were given to us. It was not very successful.
This year I knew I would need to get my raised beds done. Once again I was feeling like I might not have time to get it done. I had my husband help me assemble the old fencing ones in our front yard... but I just did not like the look and my heart was really set on making galvanized tin ones. I had seen some last year that were trimmed out with wood that was so pretty but not only would that come with wood rot issues in the future, it would also be more expensive. My daddy called me a couple of months back and asked if I wanted some old tin that a neighbor wanting to get rid of. I said yes not really even having an idea what I might use that for or what exactly it was. Once it was here I thought about different projects to use it for but had not settled on what to do with it. The sheets were cut into 5 foot lengths. I kept looking at that tin and then, one day I saw a design for raised bed that did not have wood frames on it. The more I thought about it I realized I could do that and I could use what I had here and it would be low cost.

This is what I came up with. My new raised beds!!! I am super excited! They are 15' x 2 1/2' and 1' deep. I have learned from past experience if they are very wide I have a difficult time reaching in during weeding and picking. The two beds are just far enough apart to push a mower (an important detail I have learned). All materials are recycled, except the flashing that I used to bind the tin together. I also used the flashing to make brackets that are holding the support posts. The support posts are metal poles from an old trampoline net that did not last. The tin is the recycled tin my daddy delivered to me. It is short 5' sections. If you had full length sections of tin (10' normally), you would not require as much flashing for this project. We ripped (cut) the tin down the center longways for a depth just over 1'. One piece of tin per bed was cut in half so the bed would be 2 1/2' wide. Trust me when I say that 5' wide would be too wide for working these beds later. I learned that lesson the hard way. I had the tin screws leftover from a previous building project.
We lined the beds with plastic drop cloth sheeting leftover from a recent painting project and we also used our soil bags. The trick to this is to dump one bag into a wheelbarrow (etc) and place the thick plastic bags in the bottom of the raised bed and then, start opening more bags and pouring your soil onto those bags. As you empty a bag it goes into the bed. At the end you pour the soil in from your wheelbarrow.
The only cost for me was the flashing which I purchased at Parker's for $4.29 a 10' roll and I bought two rolls. $8.58 !!! Totally what I wanted... Priceless!!!! The real cost is in filling it with soil. I absolutely will not purchase anything that says "Scott's" or "MiracleGro" because I refuse to intentionally support Monsanto. Hopefully, my soil choice was not a sub company of theirs. I got the Compost & Manure mix by American Countryside at Wal-Mart. I just gave up on finding what I wanted locally because I was not getting great reports on quality. I have 40 bags in my beds right now.


 I love to use old galvanized containers for my container gardening. I have more that I will be filling and I have not decided exactly where the container gardens will be. It is wise to decide this before filling them usually since they will be heavy once filled with soil. I like the area I have them in if I had them arranged nicely but I do not like the idea of the weeding that it is sure to require around them. All of the containers have seeds planted in them. It is all coming together.
Now, I just need to build two more of those raised beds... (wink, wink).
This year I knew I would need to get my raised beds done. Once again I was feeling like I might not have time to get it done. I had my husband help me assemble the old fencing ones in our front yard... but I just did not like the look and my heart was really set on making galvanized tin ones. I had seen some last year that were trimmed out with wood that was so pretty but not only would that come with wood rot issues in the future, it would also be more expensive. My daddy called me a couple of months back and asked if I wanted some old tin that a neighbor wanting to get rid of. I said yes not really even having an idea what I might use that for or what exactly it was. Once it was here I thought about different projects to use it for but had not settled on what to do with it. The sheets were cut into 5 foot lengths. I kept looking at that tin and then, one day I saw a design for raised bed that did not have wood frames on it. The more I thought about it I realized I could do that and I could use what I had here and it would be low cost.

This is what I came up with. My new raised beds!!! I am super excited! They are 15' x 2 1/2' and 1' deep. I have learned from past experience if they are very wide I have a difficult time reaching in during weeding and picking. The two beds are just far enough apart to push a mower (an important detail I have learned). All materials are recycled, except the flashing that I used to bind the tin together. I also used the flashing to make brackets that are holding the support posts. The support posts are metal poles from an old trampoline net that did not last. The tin is the recycled tin my daddy delivered to me. It is short 5' sections. If you had full length sections of tin (10' normally), you would not require as much flashing for this project. We ripped (cut) the tin down the center longways for a depth just over 1'. One piece of tin per bed was cut in half so the bed would be 2 1/2' wide. Trust me when I say that 5' wide would be too wide for working these beds later. I learned that lesson the hard way. I had the tin screws leftover from a previous building project.
We lined the beds with plastic drop cloth sheeting leftover from a recent painting project and we also used our soil bags. The trick to this is to dump one bag into a wheelbarrow (etc) and place the thick plastic bags in the bottom of the raised bed and then, start opening more bags and pouring your soil onto those bags. As you empty a bag it goes into the bed. At the end you pour the soil in from your wheelbarrow.
The only cost for me was the flashing which I purchased at Parker's for $4.29 a 10' roll and I bought two rolls. $8.58 !!! Totally what I wanted... Priceless!!!! The real cost is in filling it with soil. I absolutely will not purchase anything that says "Scott's" or "MiracleGro" because I refuse to intentionally support Monsanto. Hopefully, my soil choice was not a sub company of theirs. I got the Compost & Manure mix by American Countryside at Wal-Mart. I just gave up on finding what I wanted locally because I was not getting great reports on quality. I have 40 bags in my beds right now.


Now, I just need to build two more of those raised beds... (wink, wink).
Monday, June 9, 2014
O Give Me Some Figgy Pudding... Figs
Okay, so it is NOT Christmas season and I don't really know what Figgy Pudding is, but...

I grew up eating these little gems when my grandmother made them as preserves. They were dark and syrupy and to be honest I always thought figs were brown on the vine. Of course, they do turn a tan color but I did not realize the that brown color comes from cooking them. I also did not realize that you can just eat them straight off the bush. They are incredibly sweet and tender. No one at my house truly has come to appreciate them, but I hope to see that change as this season's figs begin to ripen.
Do you like figs? If so, how do you like to eat them?
Hello figs!
I grew up eating these little gems when my grandmother made them as preserves. They were dark and syrupy and to be honest I always thought figs were brown on the vine. Of course, they do turn a tan color but I did not realize the that brown color comes from cooking them. I also did not realize that you can just eat them straight off the bush. They are incredibly sweet and tender. No one at my house truly has come to appreciate them, but I hope to see that change as this season's figs begin to ripen.
Do you like figs? If so, how do you like to eat them?
Saturday, June 7, 2014
Surprises on the Vine!
We had a week of good rain, so I have not been out to this little area of raised beds lately. Somehow I missed that there were tomatoes growing! This was a nice surprise.....

I do need to get out there today and do a little watering, though. That rain has now ceased. I can hardly wait until harvest time! Thank you Lord for the surprises you give us each and every day.
Roma tomatoes
I do need to get out there today and do a little watering, though. That rain has now ceased. I can hardly wait until harvest time! Thank you Lord for the surprises you give us each and every day.
Friday, May 30, 2014
I Want a Johnny Appleseed Mentality
I have been thinking about the orchard plantings we have done over the last year. We have added quite a few things to our property:
It could be real easy to get caught up in the fact that not everything starts to produce as soon as we want it to.... or that what is produced gets taken by the birds, squirrels, or other wildlife before we get much of it... or that some plants simply do not make it.
But I want to have a Johnny Appleseed Mentality about it all. Who knows what my future holds. I may not even be living here when all my plantings start to really go to fruit. But even so I am planting and the reality is that it may never benefit my personal body. It may be others that reap this harvest. The thing is if we all had a Johnny Appleseed Mentality and we were all planting then our world would be filled with fresh fruits and veggies growing all around us. I imagine a world where you go to look at a property that is for sale and it is has orchard plantings instead of decorative shrubbery. Now, that would be amazing.
- 3 varieties of blueberry bushes - 6 bushes
- 1 mayhaw bush
- 3 varieties of grapes
- 1 peach tree
- 1 nectarine tree
- 2 varieties of pear trees
- 1 satsuma tree
- 1 navel orange tree
It could be real easy to get caught up in the fact that not everything starts to produce as soon as we want it to.... or that what is produced gets taken by the birds, squirrels, or other wildlife before we get much of it... or that some plants simply do not make it.
But I want to have a Johnny Appleseed Mentality about it all. Who knows what my future holds. I may not even be living here when all my plantings start to really go to fruit. But even so I am planting and the reality is that it may never benefit my personal body. It may be others that reap this harvest. The thing is if we all had a Johnny Appleseed Mentality and we were all planting then our world would be filled with fresh fruits and veggies growing all around us. I imagine a world where you go to look at a property that is for sale and it is has orchard plantings instead of decorative shrubbery. Now, that would be amazing.
Monday, May 26, 2014
Choosing Garden Containers
When choosing your gardening containers think
outside the pot.
Years ago my neighbor was tossing this water trough that had a hole in the bottom. Sometime later I acquired this galvanized milker that is hanging on the side of the trough. My daddy found this old porcelain coated dishpan for me. This little corner of my deck contains a few of my favorite things.
The dishpan has become a succulent dish garden. The trough makes a great container garden for many things. I have grown bell peppers, lettuce, cilantro and quite a few other things in it. Since it is deep it makes a great container for plants that are deep rooted. The milked usually has lettuce or some herb in it.
Anything galvanized is one of my favorite things!
I am sharing this post on the following Blog Hops:
(click on the pic to go to the host site)
Thursday, May 22, 2014
Gardening: Two New Raised Beds, Take 1

This picture shows the two raised beds we added this year. The vines on the ground in front are from a nearby Venus grape bush that I need to stake up soon. The bed has tomatoes planted in it with sunflowers at the front. Clearly I need to weed a little, but the weeds are smaller than they look.
The picture below is a closer pic of the one in the back. It also has tomatoes in it with sunflowers and I added some lilies to it that needed to be planted.
I will be needing to get the tomatoes staked up soon as the last rain we had weighed them down. I can not wait to watch this grow. I'll will keep you posted.
About eight years ago Hurricane Rita came over our house and knocked down a privacy fence that divided our property and we stacked all the wood up. We have used it a little at a time for some random things.... a tree house, raised beds, etc.. So, save that old wood. You never know what you might need it for.

Thursday, May 15, 2014
A Few Things Growing in MY Backyard
It is amazing the feeling you get when you plant things and watch them grow! I highly recommend you plant something even if you don't want to be a gardener or a homesteader. Pick one thing and just plant it. You will be amazed as you watch it grow.

These are grapes... in MY backyard!!! One day they look like these dead vines and suddenly they begin to sprout growth and get leaves and a few weeks later you suddenly spot these amazing little clusters of tiny flowers that become eensy, weensy little grapes. I live in Southeast Texas and I have never seen anyone grow grapes in their backyard. I just assumed it was not possible. Guess what?! It is!!! Just because other people do not grow something in your area does not mean it can not be done. So, if there is something you are wanting to grow in your backyard please do not assume it is not possible. Instead, get on your computer and start searching... or read a book... whatever works for you. Find the plant you want to try and then check what zone it grows well in. It is best to trust that and pick a variety that works well in your area. You might love Red Delicious Apples, but they may not be good for your area. That does not mean you can not grow an "apple". For me that means I needed to plant Gala Apples and I also needed to plant an Ein Shiemer Apple (small hard green apples) to be a pollinator for the Gala. The grape bush in this picture is a Champanel Grape. I will be honest I really did not do my research. I was thinking we would be eating these little treasures right off the vine. It turns out they are more of a wine or jelly making type grape, but that is okay because.....
I HAVE GRAPES GROWING IN MY BACKYARD!!!
Seriously, it is just amazing to watch them grow. Since then I have also planted two other varieties: Venus Grape (good for table eating, wine, & jelly) and Lakemont Grape (sweet green table eating).

These little gems are Goldmine Nectarines. Oh my gosh... they are so sweet! The birds think so, too.... unfortunately. But that is okay. Planting these things is something you have to be willing to invest time in... and I don't mean just your personal, hard working "time" in planting and nurturing it. I mean, you have to be willing to WAIT while your trees (and all your plants) have time to mature and strengthen and produce more. Planting is not merely for what you will get now. It is somewhat of a "time investment". If you wait it out, eventually your time investment should pay off. We are blessed that this small tree has produced last year and this year already, and this is only its second year in the ground. We won't really get more than a few nibbles this year, but that is okay. The birds don't know we planted this here for our OWN selfish enjoyment. There are probably 20-30 nectarines on it and they are already ripening even though they are very small. That's all fine... remember its a time investment.... right now this tree is maturing for a big harvest in our future.


This is one of my four varieties of blueberries. I went a little overboard! I had bought two Tif Blue , one Premier, and one Brightwell blueberry bushes and then, I went to a local plant nursery that had locally grown blueberry bushes for sell for a mere $3 each. I snatched up three Rebel Blueberry plants. That is SEVEN blueberry bushes... I guess you could say we have one for each person in the house. Ooops! When they get larger we may be in the Blueberry business!!! This is another fruit that the birds are beating us to, but once again we must remember this is a "time investment" type of thing. One day I am sure there will be plenty for the birds and us.

The pic below is a new raised bed that we put in for growing veggies. If you look close you will see some lilies starting to sprout up that I snuck in the there. ;)


Not everything we grow should be for our physical nourishment. Our heart and soul needs some nourishment, too! This is one of my irises in my lily garden (a.k.a. the weed garden). My lily garden is wild and unruly and has a mix of whatever I stuck in the ground. I did not plan at all. I just planted. Most of it has been lilies that have been shared from a friend or transplanted from somewhere. It is my little patch of craZy and I love it. At this time it amazing, but by the time late Summer or Fall come around it is quite messy and I just get the mower out and mow it all down. Every year it is faithful to come back up. I can not tell you the times I have looked out my window to find a beautiful lily emerging just as I have really needed a lift in my spirit. God is amazing! He has such creativity and I am so glad I get to grow some of His creations in MY very own backyard!!
I am sharing this post on the following Blog Hops:
(click on the pic to go to the host site)
I am sharing this post on the following Blog Hops:
(click on the pic to go to the host site)
Thursday, May 16, 2013


Thursday, March 28, 2013
Growing Giggles and Garden Inspiration

Sierra, 9, at Shangri La Gardens in Orange, Texas in the children's garden
Grow giggles!
Are you growing some giggles?
Sierra sure looks like she is thinking about something giggle worthy!
I love theses garden people she is hanging out with.
The little one is named "Sprout".
.... Because he/she is the little "sprout". So cute!
I love how the old rubber boots have Spanish Moss growing out the top...
and the bushy head the parent has.
They are certainly all giggle worthy.
All of the gardens here are beautiful and well thought out, but the children's garden is the most inspiring to me. They have beautiful raised bed gardens and what makes them beautiful is the abundance of growing herbs and vegetables. And everything is there for you to enjoy... and I don't mean to just look at. You can observe it, touch it, smell it, and EAT it. I always feel like I am doing something wrong, but they freely pick it and hand it out to you to sample and encourage you to pick and eat as you please.

Caden is pumping water while Sahara observes.
I love the way the raised beds are surrounded by pea gravel . There is another row of raised beds like this to the right of the paved walkway. To the left is the Orchid greenhouse. Behind us is a large herb garden, an children's "potting shed" playhouse area with little lawn chairs for the kids, and a dirt pit for them to shovel and dig in. Even with just this tiny glimpse you can clearly see how inspiring these gardens are.
So, what are you planting?
Sunday, March 17, 2013
Repurposed Items for Container Gardening
I was looking around online and found these great ideas for planting containers. I am a believer in using what you have or repurposing something that can work for your needs, so all of these ideas caught my eye. Gardening is all I seem to be able to think about lately. Tis the season!!! I shared these links with a local group of friends and I thought it might be nice to share them here, as well. I hope someone finds them useful. And not that you will do exactly what is pictured, but it will make you think to look at things through different eyes. Maybe you have something that you are planning to toss in the garbage, but it can be uses as it is, painted a different way, or be completely redone to serve a new purpose. I know I have some scrap boards from a treehouse project we are doing that I can build like a simple miniature raised bed more like a square wood pot and I can just see it being about two foot high and making it completely bottomless. I can put newspaper (etc.) down under it and plant some potatoes in it and when it is time to harvest just lift the wooden box off and harvest my potatoes. Maybe I need to make it a little taller, but you get the point.

Planter idea: Wood scrap planters.... so pretty!
Planter idea: Wood scrap planters.... so pretty!


Tuesday, March 5, 2013
Plans for Our Little Acre for Spring 2013
We are more of the hobby farmer/gardener/homesteader types. I just want to be clear about that. Sometimes what we are doing here might sound big, but really we are just beginners going through a lot of trial and error. I would love to produce all our food right here on this little one acre in the middle of town and I know it can be done, but we are not doing that, yet. In fact, I am pretty sure we would starve. I grew up in the country. All around me were corn fields and cattle grazing, but I did not grow up that way.... none of that sort of thing was going on at my home. My daddy worked, my momma went the grocery store and bought what we needed. End of story. I can remember a small garden one time, but we were not really a part of it. I don't remember that being a shared venture for the family. My daddy bought three cows once to raise to eat. He kept them a few months and sold them after deciding not to mess with that any longer. I had a horse for a couple of years strictly for fun. I lived on 11 acres.
Do you see the irony here? Pretty funny because now I live on one acre in the middle of town and have limited space and now I want to do those things that I grew up with endless space for. Ironic. So, now without having any experience we are trying to figure it out. Well, I have been. Cody is just getting on board. Last year he started taking part in more of it even though his interest is not really in it. This year he seems to be interested. I think it was good for him to realize how much we benefited from the harvest over the past several months. I think he had to see some of the rewards to appreciate the journey. So, this year we are plowing up more dirt and looking at it from a different perspective. It is more about sustainability. What would we need to be able to do if we ever had to provide for ourselves. All the creatures we have now have to have more purpose than just ""science" for our kids and a bunch of eggs. That's all fun, but I told my husband it is too much work and we are spending too much money on it. This is the sort of discussion that led to the first culling of the duck flock.
All that being said, I will try to detail what we have going on:
I will start with the garden areas.
The "birds":
Do you see the irony here? Pretty funny because now I live on one acre in the middle of town and have limited space and now I want to do those things that I grew up with endless space for. Ironic. So, now without having any experience we are trying to figure it out. Well, I have been. Cody is just getting on board. Last year he started taking part in more of it even though his interest is not really in it. This year he seems to be interested. I think it was good for him to realize how much we benefited from the harvest over the past several months. I think he had to see some of the rewards to appreciate the journey. So, this year we are plowing up more dirt and looking at it from a different perspective. It is more about sustainability. What would we need to be able to do if we ever had to provide for ourselves. All the creatures we have now have to have more purpose than just ""science" for our kids and a bunch of eggs. That's all fun, but I told my husband it is too much work and we are spending too much money on it. This is the sort of discussion that led to the first culling of the duck flock.
All that being said, I will try to detail what we have going on:
I will start with the garden areas.
- We are using what we learned last year about where the sun falls on our property and trying to plan with that in mind. We have a small garden patch by our house that is currently planted with two types of potatoes, two types of onions, and a wheat patch. The wheat is an experiment from some wheat that spilled and got dirty. It is growing well and is already about 6 inches high after only two weeks.
- We will be tilling up a bigger garden in our back quarter (that is the back of our lot that is a 1/4 acre that we purchased a few years back). This will be a variety of vegetables.
- I will be putting in a long narrow garden, as well.
- I am considering doing a raised bed corn method that I saw at a local Expo.
- For fun I am considering planting a long row of sunflowers that will also provide a natural boundary on one portion of our property. We have some neighbors that are bothered by our chickens (and everything else we do), so we might add a simple fence.
- I am trying to use all organic methods and heirloom varieties, as well.
- Currently, we are working on adding various fruit trees. I have seven blueberries (four different varieties), two apple trees (two varieties) , a plum tree, two pear trees (two varieties), three grape bushes (3 varieties), a peach trees, a nectarine tree, mayhaw, satsuma, and navel orange. Some of this should have some production the first year I am told, but much of it will require waiting for the second or third year.
The "birds":
- We currently have nine ducks left in our flock. They are messy and eat a lot of feed. Overall, they are not the best choice for raising for meat. We have enjoyed the experience, but we are going to cull the flock. We might keep one or two, but likely they will all go, so we do not have to deal with their messes. They house nicely with all the other birds, but they make messes by trying to swim in anything they can which keeps the chickens water nasty all the time.
- We have nineteen chickens for the purpose of laying eggs. Really, we were not ever supposed to have this many, but my husband was not ready to kill the chickens for meat. Our hens are "our ladies" and we have grown quite fond of them around here. I am considering isolating some of them for a few days and seeing which ones are laying and which are not to consider culling some of them because we really do not need this many. The feed bill needs to be lowered and I am not really one for selling the eggs because I would rather bless others with them. I am uncertain of our plan for "our ladies". They are not a bother, so it is not urgent to decide either.
- We recently added turkeys to our flock. We have a Tom and two gals. They are all full grown and about three years old. I thought we were getting them to butcher, but Cody is the one that got them. He says we are raising turkeys now.... so we are raising turkeys now. Once they start laying we will let them hatch out their eggs and raise the babies for the meat. The Tom is beautiful I must say. It is quite interesting to watch him protect and guard his ladies with his feathers all spread in the air.
- I have been trying to convince Cody that we should be raising chickens for meat, but he has not been easy to convince. Our most popular meat in our home is chicken. It makes sense that we should raise our own for meat if we are raising chickens. So, I was sitting here one night and just for kicks I was looking at Murray McMurray's website and IDEAL Chicken Hatchery's website and IDEAL had a sale on Straight Run Black Broiler chicks for 90 cents a chick. I told Cody and he said to order them... REALLY?... really.... so I ordered 30 and shipped and everything was $34. That was just too good of a price to pass on. We received 31 chicks, but have lost four... still a bargain. They are about two weeks old and are growing really fast. We will plan to butcher them in May when they reach full size. They are supposed to be ready within 7-8 weeks, but I have heard that they take a little longer and I am okay with it take a little longer. I also am considering keeping one rooster and a couple of hens from this flock to use for raising our own broilers without having to order. We will determine that after seeing how well these birds do for meat chickens in the end.
- Our most recent addition was quite accidental really. A lady in my Sunday School class mentioned that she had three roosters to give away and I made a mental note of it, but told her that since we live in town we were not going to have a rooster that would make noise and bother our neighbors. One of my neighbors sent me a message wanting to know if I knew someone that had a rooster and I told her I would check for her. I contacted the lady with the roosters and she said she had one and he was a friendly Buff Orpington. Hmmmm... I have two female Buff Orpingtons and so now we have a rooster. I have separate area in our chicken coop and so I have put the three Buff Orpingtons in there to mate and hopefully hatch out their own eggs. I must admit I am considering pulling the eggs and putting them in the incubator because the hens have over a dozen eggs in there and they are not sitting. These chicks will be raised for meat or sold as hatchlings.
Thursday, November 15, 2012
My Meager Fall Gardening Attempts
I have said it before and I will say it again. I am not an expert gardener... at all. But... I attempt it. I keep trying and have never planted a Fall garden before, so everything I am doing is all just to test it out this year. So, I really got a bit overwhelmed with managing the Spring/Summer garden and I found that some of the large container plantings that I did were much more manageable for me. So, I started with what I had in place:
In random planters I started the following from seed:
I like to let my ducks and chickens free range, but I am learning the hard way that they like to dig up seed that has been planted. Apparently, they like small freshly growing green leaf lettuce also, since they ate mine up along with some of the brocolli sproutings. Also, a very sweet little darling that is trying to work with momma at the ripe old age of 19 months is likely to "weed" out all your best lettuce crop you have going. All these things considered I ended up replanting and we have not had a harvest, yet. I am watching the weather for frost chances so I can cover my plants in the event of a freeze. I am hopeful. Today Savannah and I were outside sampling he spinach and the brocolli leaves. Both were pretty good. Savannah even sai the spinach was delicious. That made my hear sing! And then, when eating the brocolli leaf I expected her to spit it out and she said she could not tell a difference and they were both good. I could tell a difference. The brocolli leaves taste similar to cabbage, but I am just happy she liked them both. Now, we wait... and let them grow.
Other than keeping the garden safe from the animas I am learning the importance of the right sun levels. I have some plantings that are in the same general area, but are getting a little more shade and those are just not growing well. Also, I planted some lettuce under some bell peppers in the same pot. Although they sprouted up quickly, they seem to have slowed down in growth once they got to the point that the shade of the bell pepper plants was on them. Another thing that I am realizing is that bigger is not always better. I thought I needed bigger deeper planters, but am finding that some of my smaller shallow containers are doing the job better. Old wash tubs with drainage holes make really good planters, so I will be on the lookout for more of those.
Pictures won't really show you much right now, but as I get a harvest I will try to make a future post with some pics.
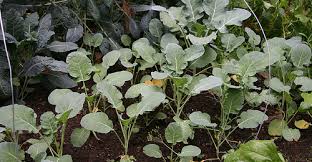
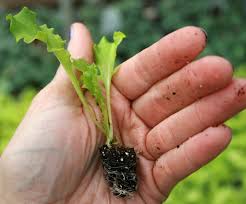
This what our brocolli plants (left) look like even though these are on my pics. And my lettuce is not much bigger than the pic in the persons hand (right).

- herbs that were still growing which included basil and parsley
- various pepper plants that are still producing that were planted in early Spring which include banana peppers, green bell peppers, marciano peppers (red)
- green onions (some that are in the second year of growth) and some from seed from Spring
In random planters I started the following from seed:
- green leaf lettuce
- brocolli
- cauliflower
- spinach
- radishes
I like to let my ducks and chickens free range, but I am learning the hard way that they like to dig up seed that has been planted. Apparently, they like small freshly growing green leaf lettuce also, since they ate mine up along with some of the brocolli sproutings. Also, a very sweet little darling that is trying to work with momma at the ripe old age of 19 months is likely to "weed" out all your best lettuce crop you have going. All these things considered I ended up replanting and we have not had a harvest, yet. I am watching the weather for frost chances so I can cover my plants in the event of a freeze. I am hopeful. Today Savannah and I were outside sampling he spinach and the brocolli leaves. Both were pretty good. Savannah even sai the spinach was delicious. That made my hear sing! And then, when eating the brocolli leaf I expected her to spit it out and she said she could not tell a difference and they were both good. I could tell a difference. The brocolli leaves taste similar to cabbage, but I am just happy she liked them both. Now, we wait... and let them grow.
Other than keeping the garden safe from the animas I am learning the importance of the right sun levels. I have some plantings that are in the same general area, but are getting a little more shade and those are just not growing well. Also, I planted some lettuce under some bell peppers in the same pot. Although they sprouted up quickly, they seem to have slowed down in growth once they got to the point that the shade of the bell pepper plants was on them. Another thing that I am realizing is that bigger is not always better. I thought I needed bigger deeper planters, but am finding that some of my smaller shallow containers are doing the job better. Old wash tubs with drainage holes make really good planters, so I will be on the lookout for more of those.
Pictures won't really show you much right now, but as I get a harvest I will try to make a future post with some pics.
This what our brocolli plants (left) look like even though these are on my pics. And my lettuce is not much bigger than the pic in the persons hand (right).
Wednesday, May 16, 2012
Radish Roots and God

Wednesday, May 9, 2012
No Suds On Tomatoes!
Whatever you do... DO NOT get the bright idea like yours truly to spray your tomato plants and other plants down with diluted dish liquid.
If there has been a sick child in your home with a temp of over 103 find a way to make a store run for the proper pest control solution.
If you feel like a sickness is coming on for yourself and do not want to go to the store, do it anyway.
If you do not want to dress appropriately to drive to the store do it anyway. Change those ratty clothes and brush your nappy hair and go! I mean really I could have just put on some shoes that would cover my dirty tired toes instead of worrying about what people would think if they saw those dirty toes. Who really cares if they don't know that I spent the day in my garden and building nesting boxes for the new chicken yard we SPENT THE WHOLE DAY building. In hindsight I wish I had just suffered the shame.
Nope! I got a bright idea... I thought I remembered people doing this before. I know I remember this tip, but alas I think it must have been a tip to use on shrubbery. {sigh} You see... I took an empty spray bottle and poured in about a 1/2 cup of dish liquid and slowly filled it the rest of the way with water. To mix it I gently turned the bottle over and oever until it was mixed. I thought I was a genius! LOL! Oh... it is so NOT funny now! My thought was that these caterpillars (oak worms) that were all over my tomato plants would not like the soap and would go away. They did!!! Yeah, that worked!!!
Oh.... but the awful thing that is left behind is my withering plants. I think I blocked my plants from breathing. And while I was spraying my tomato plants I sprayed everything else in that garden bed for fear the caterpillars would just move to the next thing.
I have three varities of bean plants in that bed that now have ashen colored leaves that were once thriving and bright green.
My bell pepper row has now lost all of it's leaves. I do hold out some hope because the tops hav a new leaf sticking out of each one. Sad... like a little flag raised saying, "We surrender! Don't spray us again!" Poor things are fighting to live.
My tomato plants that range in size from 1' tall to 3' tall (most are 3') are the biggest mess. Awe! I can not believe the hard work that went into this little garden. They are all withering, ashen, and yellowing. I did spray this whole garden down really good yesterday to see if it will wash the soap away. Time will tell. And I forgot and left the water on so the ground go super saturated, so maybe that will help. They look like they COULD survive. I am still hopeful. All is not lost... I have learned my lesson!!
And my bumper crop seedlings (bell pepper and tomato) that I have out on my deck.... well, I spray those, too. Yes, they are ashen as well and the bell pepper plants are naked (no leaves). And some of my container plantings I did the same to. Yes, my gorgeous basil that is almost a foot tall that I grew from seed... now ashen colored. My dill that I grew from seed that my dear friend said was hard to grow. Well, it was doing well and I was very proud of my efforts. It is about 7 inches tall... now it looks a little dry. I have learned!
And I want to warn you. Don't do what I did!!!
Fortunately, I was over ambitious with my gardening and I have another garden with peas and cucumbers and such that I did not spray since it is well away from the tomato plants. And I have another garden waiting for me to be well enough to feel like working in this week that I am going to fill with seeds. Now, I might be adding tomatoes and bell peppers there as well. It is late in the season, but I was planning to experiment with bumper crop plantings anyway. I am not happy about it all, but it a learning experience.
And so we live... and learn... not all is lost as long as we can gain some knowledge. The best lessons in life are usually the hard ones! ;)
No Fear: Radishes Are Fast!
I am not an experienced gardener, so this year I just decided not to follow fear. So many times we let fear hold us back. Even in the simplest of tasks most of us don't want to fail. In the past I have just tried to try planting a few basics: tomato, bell peppers, cucumbers, etc. (and seriously, not much more than that). This year I have just picked up a variety of seeds. One of the things I am trying out this year are radishes. I am not really sure who is going to eat them besides me, but I can say that my oldest daughters is interested just because she sees the radishes growing. I am going to say that again... she is interested in the radishes JUST BECAUSE SHE SEES THEM GROWING! If that does not inspire a person to plant a garden, I don't know what would.
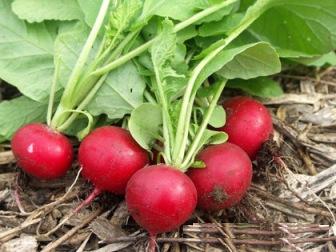
Anyway, little did I know that radishes are a fast growing plant. We planted the seeds one day and two days later they were popping up out of the ground. A couple weeks and you have red radishes shining out from under the beautiful leafy tops. And I never really thought about how a radish grows. They just kind of sit there on top of the soil with a small root going down into the ground, so you get to watch them as they grow. In about a month's time you are ready to harvest radishes! We have some that we could harvest, but I am trying to hold out a few more days. One more thing I had read was that if they do not get a lot of water they will be hot to the taste. I don't like when radishes are hot, so I have made a point to water them more than I might otherwise do. Savannah has shown an interest in helping me add some extra watering as well. I really enjoy when my kids help in some way. And it is interesting how each child has done some part of the garden with me. We have not worked alongside each other through every step; however, each child has stepped in for the parts that draw their interest. I have really enjoyed seeing the garden "draw them in". I know in time they will develop even more interest and a love for gardening.
Update: I got busy and so this is a couple days later... I did go ahead and harvest a few radishes that were definitely ready. Savannah and I tasted them, but I was sad to find they are hot. I guess I did not fully understand what it meant when it said they need a lot of water to not be spicy. I think they are going to need to be mixed in a salad or something and served with a creamy dressing (milk coats the taste buds and lessens the sting of hot things). So, I guess we need to add some daily watering to our day for the rest of the crop. Anyway, they are so beautiful and fun to watch grow. The leaves are edible as well and have a good taste. I could totally see eating them in a salad. Just in the last few days ours have started turning brown around the edges, so I do not plan to harvest them for salad. The next time I plant radishes I will water more, harvest them early, and harvest before the leaves start to turn. It has been fun to watch the radishes grow.
This is not my actual photo, but mine looked just like these. I am thinking that in the future I will plant some in containers (like old galvanize wash tubs which I love) and place them around my deck. They are as pretty as a flower growing!!!
Sunday, April 15, 2012
Planting more and more and more....
I just keep planting more and more seeds. I am so excited to see how this journey goes. On the one hand I am very hopeful and excited to see what will come off all my little gardens. On the other hand I am trying to be realistic. I have not had great gardening success in the past. I have always had some gardening success on a small scale, but this year I want to really have a harvest. A REAL harvest. I am making little gardens all over the place. I had a few tomato plants that I planted along a wall outside the back of the house and beside that is a small single row garden that will be only bell peppers (6 foot long*). Not far from that one is a little garden that is partially shaded during a big part of the day that I planted some lettuces and such in... knowing that it is likely to get to hot, but using up some older seeds. That garden is 4 foot by 10 foot and has two varities of leaf lettuce, spinach, radishes, carrots, and onions. Near that garden is another that is a square garden (15 foot x 15 foot) that I planted 3 varieties of green beans and some yellow beans, 3 varieties of tomatoes. Along my deck I have planted another little row of tomatoes about 8x8 foot. Today I planted another garden that is about 15x15 foot that has butter beans, crowder peas, purple hull peas, snow peas, and four varieties of cucumbers. In various containers around my deck I have planted some flowers for fun and some herbs and peppers. I have also planted gourds at three of the fence posts of our dog yard so those can climb up the fence.
Also, I plan to have some of my cucumbers trellis style just to see the difference in how well they produce. It will be interesting to see if the ones on the ground or the ones that are on a trellis do better. As for the construction of the trellis.... well, I am going to be frugal. Basically, each "trellis" will really be two stacks with yarn woven back and forth. I would really like to try raised bed gardening with boards around (or logs), but I can not pull that off at the moment. That may be something we add in the future. The lates thing I have heard about is "cardboard gardening" and I plan to do that some this year. I will used cardboard for weed control this year, I think. And it is a simple concept really. You lay the cardboard over the weeds, spray well with water until saturated, and leave the cardboard there to smother out the weeds. If you want to learn more just google it or look on youtube.
My goal is to learn to use this little acre in the middle of town to grow some of our food. In the coming week I hope to get another garden going that will have a variety of types of vine growing plants like squash, zucchini, pumpkin, watermelon. I also want to plant marigolds around my tomato plants to help keep the bugs away. I bought some other flower like zinnias hoping that they also deter bugs, but I am not sure if they do. I will try to add a post later that shows some pictures, but honestly it is not much to see until the growth take off other than a lot of dirt with gras around it. ;)
*Sizes are approximate and I have not measured
Friday, April 13, 2012
Frugal Farming Solutions
Well, I was about to write a post about my little feeder I made and when I started looking for a pic I needed I realized I had quite a few "frugal farming solutions". Wow! I am even more frugal than I realized! Ha! ;)
First, I want to start with heat lamps and such. My husband purchased a few large heat lamp bulbs for
about $5 each and I grimace with pain at the very thought. Especially, since all you have to do is bump those things and they blow out. Yikes! A simple cheap light bulb will do the trick in most circumstances and you can pick a 4-pack up at Wal-Mart for under $1. And while I am on that topic a simple clamp style shop light for about $5 will do the trick to screw that ligt bulb into. We use these indoors and out, but do take precautions regarding safety. Don't let cords dangle unsafely on the ground or in water. Point the shop light downward, so water does not go into it.

It was cool and flooding when we got these little gals, so they got to live in our house for a couple of weeks. I am sure it stunk a bit, but nothing some bleach and a mop couldn't fix. Again I say, thank God for tile floors! ;) If you look closely you will see three baby food jars in the bottom left corner of the cage. At this time we had an older set of chicks outdoors that had our chick feeder and waterer occupied. These little baby food jars work perfect for holding feed. Do NOT use them for water, though. I learned the hard way after we found a drown chick that a baby chick can drown itself quite easily. After losing one of my sweet little Aracaunas I used a plastic peanut butter jar lid for their water dish.

As these gals began to grow they became more and more MESSY... and for some reason this little flock liked to EAT their newspaper. I think it was because the newspaper was getting wet with the Chick Starter on it and they started eating the paper and all. I had to come up with a solution to keep them from making as big of a mess. I did not really succeed fully, but I did come up with the idea to use a milk jug as a feeder (shown in pic) and that is what they are using now still (about 3 week old). Also, the bottom of plastic soda bottles, juice bottles, etc. can be cut off and used as water dishes. If you look closely in this pic you will see one and a red peanut butter jar lid as well. It is not glamorous, but it has saved us money and been a great way to re-purpose some garbage.
Milk jugs can serve as great little baskets for gathering eggs or holding feed. Simply cut away the top as shown in this pic:

As we empty a milk carton instead of putting it in the trash I do a quick rinse and cut the top off. If I have one in the kitchen I also collect scraps from mealtime in these sometimes. When we head outdoors we have a nice way to carry our scraps to the chickens. We mostly use them for carrying feed or gathering eggs, though. When working in the garden they are perfect for using as a little carry-along to hold set packets and tagging supplies. And I am certaion they are going to be great for harvesting food from the garden. You can see where there are endless uses for these little milk jug totes.
And I am not done with those milk jugs just yet... They can be used as scoopers, also. Simply cut away the bottom as shown in this pic (leave the cap ON):

Flip it over and you have a milk jug Scooper ! This works pretty well for scooping feed from our large feed containers into smaller feed containers. They are kind of flimsy, but useable. The best homemade scooper I have made has been from a plastic vinegar bottle because it is sturdier plastic.

Cutting at an angle makes a wonderful little vinegar jug Scooper. And my latest discovery is large Vegetable Oil jug Scoopers! You cut away at an angle just like the vingar jugs:

I also made our chicken feeders from potting pots that plants come in. You know... the black plastic temporary pots. We had some that are probably about three gallon size. They originally look like this:

Ours were like the larger ones, but about twice the depth. I used a jigsaw to make the drain holes on the sides about three times as wide and they need to be about 1 1/4 inches in heighth, also. I purchased galvanized dog feeding pans at Wal-Mart. Yikes! I actually spent some money on this project. Ha! But spending under $3 a piece on 2 pans for each feeder is way less than buying a commercially made feeder at over $50. After you have your planter pot ready set it into one galvanaized dog pan and fill with feed. The other pan will be your lid. You may have to use your jigsaw to cut away the edge of the planter pot to make the "lid"(pan) fit. The only other thing to note is that this feeder needs to be set somewhere that stays dry. If it is in a henhouse you will have no problems. Ours sits on the ground in the chicken yard and I had to add a concrete pad under it to keep water out during super heavy rain. If anyone needs better instructions on the feeders, let me know. I can take some more pics if this does not make sense.
Also, I use empty plastic ice cream buckets in my refrigerator for egg storage. The rectangular ones work well. Other plastic containers are great for this. I do not use egg cartons because they take up way too much space.
For tagging my plants and seeds I use large yogurt containers. I cut down the container in strips about 1 1/2 inches wide and cut across the bottom. I just trash the bottom piece and sometimes use the lids for paint pallettes. On the unprinted side of my plastic plant tag I write the name of the plant and date with a permanent marker. I am uncertain how well the marker holds up and I will try to update that later.

For now that is all I can think of. Being frugal comes quite natural to me, so I do not even realize I do this stuff. I also keep the little containers my tomato plants and such come in and re-use those. Old cups and yogurt containers make great shoveling cups for dirt.

Saturday, March 31, 2012
Planting Time!
I am by no means a gardener! This year I am going to give it try, AGAIN! Last year's drought was enough to turn a person away from ever trying to garden, but I am going to put in all my efforts and try again. Such is life... keep trying and maybe... just maybe, you might get the goal accomplished. If not, well, at least, you tried!!
On March 19th I started some bell pepper seeds in trays that are sprouting up. I hope they get growing bigger soon.... ugh! I am so impatient! Really, I just know it heats up in Texas fast and I want to get them well established in the ground soon. Bell peppers have gotten so pricey, so this is an important crop for me. I remember growing up buying bell peppers for 4 for a $1. Long gone are those days!
On that date I also planted some seeds in containers. I just love old galvanized tubs and such! Several years back I acquired a few and use them for various plantings. Mostly, I have done flowers in them, but I have tried a few other things. This year I am going to use them for herbs mostly. So, I planted oregano, cosmos, dill, chives, basil, morning glories, and parsley. Of course I had to do some flowers... and those seeds were super cheap (like a quarter!).
Today it was time to break out the tiller. And I am sooooo tiiiiiiiiiiiiired now! Cody did the tiller and I worked the rows and planted. And I have no clue really what I am doing... well, some clue, but not a lot. I planted a few things that are probably not going to make well due to the heat, but I had the seeds so I decided they were good for nothing just sitting in a package anyway. I did consider this and tried to plant those things in areas that have a little more shade cover during some parts of the morning and evening. I planted two diffferent lettuces and spinach. Also, two wide rows with radishes and carrots. And about 60+ white onions. I am mostly hoping to get onions from this planting area. Cody tilled up another larger bed that we planted 4 varieties of beans in. Three are green beans for snapping and one is some kind of Cherokee Wax Yellow bean. If those make (they were old seeds), then they will add a splash of color to our meals. We tend to be green color food lovers. Odd... I know!
And after all that I picked up some more seeds tonight. Oh my! And a lot of tomato plants. And I just want to share a little trick to getting more for your money when buying tomato plants (and some other plants). I was buying little 4-packs and if you look at the stems and count them sometimes there are 2 or more where one should be. One of my 4-packs had 7 actual stems in it. If you are really careful you can pull these apart and have more plants. You just have to gently pull them apart without ripping at the roots. I purposely searched through the available 4-packs to try to get some with extras and I was very lucky tonight. Woo hoo! The plants are pretty tiny, though and that makes me a little nervous.
Tomorrow after church I will plant my tomatoes and start thinking about the rest of my little gardening venture. With all those seeds it may turn into a not so little gardening adventure, especially because I have every intention of buying some purple hull and crowder seeds (peas) at the feed store, also.
Subscribe to:
Posts (Atom)